pulseEKKO PRO SmartCart odometer Calibration
is vital for an accurate survey. A correctly calibrated pulseEKKO PRO SmartCart odometer is the basis of recording and maintaining proper spatial positioning during a survey. Many new users neglect to properly calibrate the odometer and the survey positioning is inaccurate as a result. Take initiative and properly calibrate the odometer as the first step to a successful survey.
From the Acquisition Control Menu, enter the pulseEKKO PRO Odometer Calibration Setup menu.
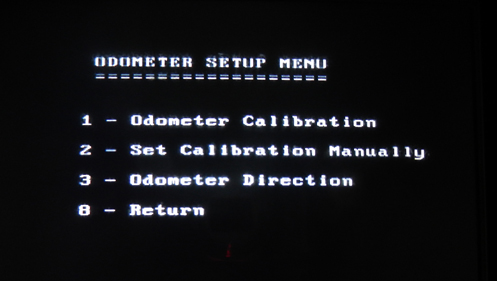
pulseEKKO PRO SmartCart Odometer Setup Menu
This menu contains 3 options for the pulseEKKO PRO SmartCart odometer: Odometer Calibration, Set Calibration Manually, and Odometer Direction.
Odometer Direction
Enter the Odometer Direction menu and select either Forward or Reverse. This determines whether the SmartCart will be pushed forward or pulled in reverse. Most surveys done with the cart use the Forward option because it is easier to view the DVL while pushing the cart.
Odometer Calibration
After affirming or changing the Odometer Direction, select the first option: Odometer Calibration. Select a length of line to calibrate the instrument.
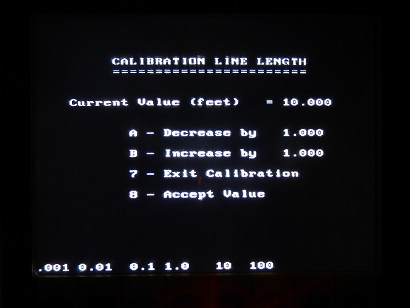
pulseEKKO PRO SmartCart Odometer Calibration Line Length Screen
In general, the longer the line, the more accurate the pulseEKKO PRO SmartCart odometer reading will be. When the calibration line length has been determined, measure a line of the same length and bring the cart to its proper starting point.
A set of directions will appear on the DVL. Set the system to zero by pressing the A button. It may be easier to use the center of the axle on the SmartCart as a reference point when calibrating a line by beginning the line with the center of the front axle at the starting point and ending the line when the center of the front axle meets the end of the line. In any case, move along the line until the SmartCart is accurately pushed the intended distance and press the B button. Ultimately, accuracy is key! Press A to exit.
pulseEKKO PRO SmartCart odometer values are usually around 1080 but can vary depending on the surface type. For example, the wheel that meets the odometer may move less through sand than on asphalt because the cart may be pushed through sand without the wheel rotating the odometer whereas the wheel will rotate the odometer on surfaces with good traction. Even on surfaces with great traction, calibration values may be different depending on if the surface is flat or not. For example, a long calibration line with many small bumps will have a greater odometer value than a flat surface of the same length, even though the horizontal distance is the same.
Set Calibration Manually
Enter the Set Calibration Manually menu if the user wants to enter a calibration value without going through the process of calibrating the SmartCart. In general, this is not recommended but can be done if calibration has been done on a site before with similar conditions.
Remember odometer calibration is absolutely vital to spatial positioning. A slight calibration error can turn into a very large calibration error as the line becomes longer. Odometer Calibration is a controllable aspect to a quality survey.
View pulseEKKO PRO TR1000 odometer calibration
Leave pulseEKKO PRO SmartCart odometer menu